Saturday, March 30, 2013

V & LB in NYC

Two of my bestest college buddies, Laura and Vanessa (Vanessa of Wear Flats to Dinner!), came into town yesterday for the weekend. Unsurprisingly, we really hit the ground running upon their arrival. Within the first five minutes, we'd established who was who in the inevitable episode of 'Girls' the weekend was sure to become (me: Shoshanna. sigh.) and discussed at length Kristin's odd habit of storing nail polish in the refrigerator. Didn't you read this fun fact in a fashion magazine at age five too?! 


After much oh-my-gosh-we-are-reunited freak outs, it was off to dinner at Italian hot spot Forcella. Their claim-to-fame is a pizza with deep-fried dough. I know what you're thinking. Off-putting. But accept the sheer popularity of everything being turned into a fried version of itself these days, and you will realize the utter genius and deliciousness that is fried pizza dough.

After devouring every last crumb Forcella had to offer, it was of course time for dessert. Or two desserts, but who's counting? We stopped first at Butter Lane for cupcakes and then right next door for ice cream. But I only documented the Butter Lane excursion, so the second dessert doesn't actually count due to lack of incriminating evidence to prove we were even there. Who said anything about two desserts again? 


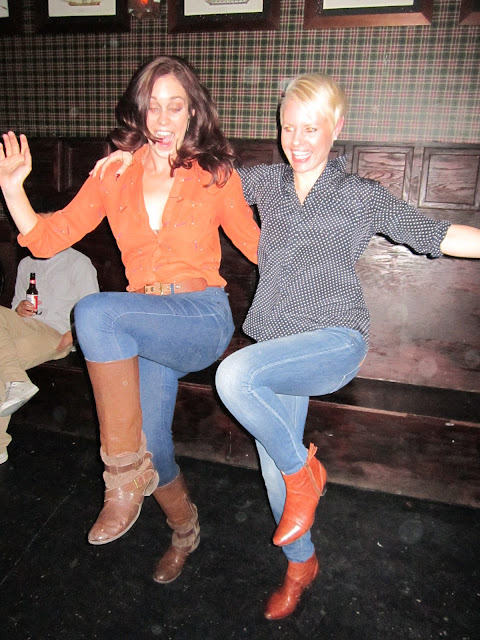
With sugar highs firmly in place, our only recourse was to dance it out so to Grey Lady we went.


Honestly, I am still just so gosh-darn excited to be reunited together in the N.Y.C., that there are really no words to accurately explain said excitement (shout out to key missing members Lisa and Alix!)... so instead I'll just let the photos speak for themselves. Or in some cases *ahem Laura* sign for themselves...


I'll leave you with a nice little sequence demonstrating Laura signing for us the song that's playing over the speakers.


We all took it very seriously. Especially Kristin.


Here's to more adventures today!
.
Pin It Now!

Thursday, March 28, 2013

Poster Metropolis

As most of you are probably unaware (all five of you lovely readers), since I go to great lengths to hide it, Kevin is an avid movie poster hoarder collector. His collections arrive weekly (ok that's an exaggeration...I think) in shiny tubes which are then carefully stored in the back of his bedroom, stacked vertically side-by-side, for eventual framing and displaying (one day). I have dubbed this area the “poster metropolis,” with its various levels of tube heights resembling the skyline of a booming cosmopolitan town. Always growing, seemingly without end. Actually, a more appropriate analogy might be a Sim City nightmare come to life, but I'll let you decide.

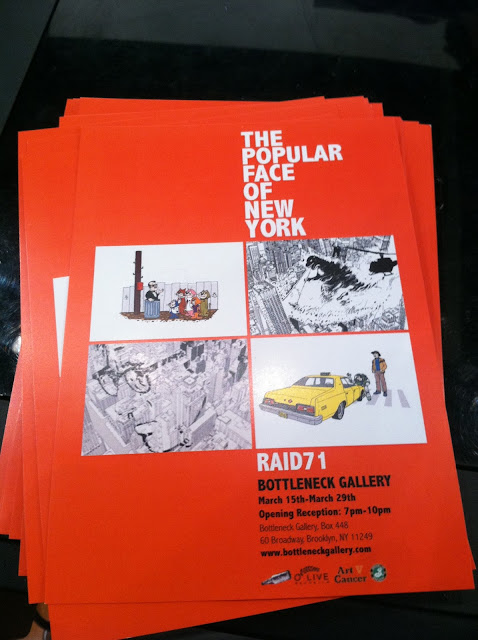
With that said, there's a small gallery in Williamsburg called The Bottleneck Art Gallery that showcases original prints and pieces
from contemporary poster artists around the country with different collections every few months. Naturally, when the latest show opened a couple weeks back, we were just dying to check it out. And by we, I mean Kevin. I dutifully tagged along :) The current exhibit, entitled "The Popular Face of New York," features work by the artist Chris Thornley (known as Raid71) that takes inspiration from classic New York-centric movies like King Kong, Godzilla and Taxi Driver


Getting to and from Brooklyn is never as simple as you expect despite the actual distance between the boroughs being less than a mile. Let's just say this particular journey across the river involved a lot of aimless waiting, mistaken train platforms, missed trains, and more waiting. I considered documenting this portion of the night, but furrowed brows and frustrated grimaces do not a good photo make. After finally emerging in Brooklyn, we made our way to the Bottleneck, where our recent travel woes were immediately forgotten and replaced with enthrallment... for one of us at least.

  
As we walked around the gallery, Kevin tried to introduce me to new terminology like “variant” (the variation on an original print, usually using different colors; e.g. the two Godzillas above) and “metallic ink” (do you care?), but most of it drifted over my head...I mean, completely registered, Kevin.  


By the end of our perusing, self-described patron of the arts Mr. Schneider walked out with five new posters.  New housing developments for the booming metropolis!  


.
Pin It Now!

Sunday, March 24, 2013

Juicer Meets World

Today the juice extractor made its official debut! Despite feeling fairly intimidated by the prospect of my first home juicing attempt, due to the below scary-looking assembly instructions...


...things turned out to be a breeze once we got over that first hump.


There are really only four simple steps to achieve juicing success, as far as I can tell. 

Step one: Wash veggies and slice up any that are more than 3 inches in diameter (e.g. apples). 


Step two: Feed said veggies into the tube one by one. 

Step three: Should any veggie give you trouble, squash them in using the "masher of death" (the technical term) pictured below. 


 Step four: Pour and enjoy!


Here's what went into my juice (yielding 28 ounces):
  • 2 handfuls of baby spinach leaves
  • 2 handfuls of baby romaine lettuce leaves
  • 3 celery stalks
  • 2 whole carrots
  • 5 large kale leaves (with stems)
  • half a cucumber
  • one apple
  • half a lemon


Best part? I totally put Juice Generation's "Supa Dupa Greens" to shame. Half the cost and twice the homemade love tastes much, much sweeter.

If you are a juicing connoisseur, please share your favorite recipes or veggie/fruit combos. I'm eager to avoid the sophomore slump with my next juice outing!
.
Pin It Now!

Thursday, March 21, 2013

Snapshot In Time

Don't you just love old photographs? With the ability to transport you back in time, a single image let's you peek into what life might have been, looked, or felt like "back in the day." In my daily meanderings around the internet, I stumbled upon these amazing photos of The High Line during its heyday in the early 20th Century and couldn't resist sharing. The High Line is an elevated railway track running along the West Side of Manhattan that was eventually abandoned between the 1960s and '70s, sitting unused and destined for demolition by 1980. It wasn't until 2009 when the City refurbished the entire 1.4-mile long line, reinventing the tracks as a public park featuring walkways, benches, and over 300 species of perennials, grasses, trees, shrubs and flowers. Looking back at these photos taken during the pinnacle, it's amazing to think how much has changed in the intervening years (but also how little! The Empire State Building is still there looking exactly the same!). Walking along the High Line now, the original train tracks are still somewhat visible beneath the benches and wildflowers if you look closely. But it's difficult to imagine the park in any other form, much less a working railway. Good thing there are photos to help us remember :)

Enjoy!


And here's what it looks like now...

.
Pin It Now!

Monday, March 18, 2013

Cinnabon Sunday


Cinnamon Rolls. Just the smell alone is enough to make your mouth water, amiright? The warm, sticky, gooey first bite... I mean, let's get real here, every Sunday should feature lots of frosted cinnamon-y goodness. Or maybe every day? Inspired by my fabulously talented friend Vanessa at Wear Flats To Dinner who's always up to something new and exciting in the kitchen, I decided to go big with my culinary ambitions in the cinnamon roll department. Maybe too big. From scratch, fully glazed, with almond flour and honey in place of white flour and sugar. As a baking novice who doesn't know the difference between a sieve and a sifter, perhaps I was biting off a bit more sticky-sweetness than I could chew? Probably. But WFTD doesn't shy away from a challenge, so neither is CL. (uh-oh same acronym as Craigslist?)

I followed this recipe from the blog Urban Poser, so feel free to skip all my baking adventure nonsense below and click on over for the full ingredient list and directions (here). In the meantime, here goes nothing!

Starting things out strong with an ingredient line-up...


First step is to combine almond flour, baking soda and salt in one bowl with eggs, honey, and coconut oil in a second.


Next is "kneading" the whole mixture together to form a smooth dough. Feeling like a real pro at this point, the only skill needed here is a background in play-doh. Experts, everyone one of us.


 More play-doh skills come in handy for rolling the dough out. Seen here pre-flattened... 


Now comes the most fun part. After pouring honey onto the entire surface of the dough, you then spread it out evenly with your hands. Using your hands instead of a spatula helps to not tear the dough. Smoothing the sticky honey into every corner and crevice of the dough's surface, I felt like some artisanal candle maker, hand-crafting one-of-a-kind wax pieces in a small Italian shoppe. Trust me, try it and you will feel the same way!


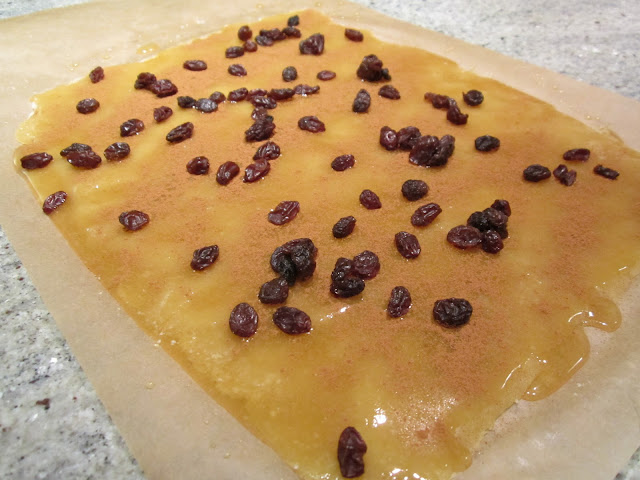
Next comes the innards. The raisins/walnuts/pecans/etc that go into the center of the roll. For me, the simpler the better, so all I sprinkled in was raisins and cinnamon. But feel free to be much more adventurous and sprinkle in whatever you like. Is it just me or is this starting to look like a giant Ants On a Log?


 Roll it up!


 Slicing and dicing to make sushi--I mean cinnamon rolls...


Into the oven they go. Bake time: 10-15 minutes.


As my kitchen filled with the wafts of warm cinnamon-y goodness, I turned my attention to the last and most nerve-racking step: the icing. In my quest for as challenging a cinnamon roll endeavor as possible, my original plan involved replacing the vanilla extract called for in the recipe with actual vanilla beans from a vanilla bean pod. Yes, vanilla bean pods exist. And they are sold in glass jars. Whole Foods is a crazy place. Eyeing my two vanilla beans with trepidation, I wavered momentarily on my initial commitment, but feeling confident enough coming off the play-doh portion, I went for it.

Lo and behold, the pods just look scary (and like giant spider legs). Scraping out the beans is easy peasy.


Mixing the vanilla beans into a bowl of coconut butter, honey and coconut milk... the frosting was ready. 


Once the rolls are cooled, on go the finishing touches. A few more dashes of cinnamon for good measure, and a smear of icing... Ta Da!


Challenge accepted and a success!
.
Pin It Now!